I have been blogging about tea at teageek.org for several years. I guess more accurately, I blogged about tea for several years there several years ago. I’ve been wanting to bring it back and decided to use it as a test case for creating a new WordPress theme from scratch, which I haven’t done in a while. I also decided it was time to get with the hip kids and give it a cool new url, so it’s not located at teageek.blog.
I’ll be writing there about tea a couple times a week if you are interested, mostly tea reviews and some things I’ve learned over the years drinking entirely too much tea.
If you are interested in the theme, you can find it here, although fair warning, it’s not quite ready for widescale use.
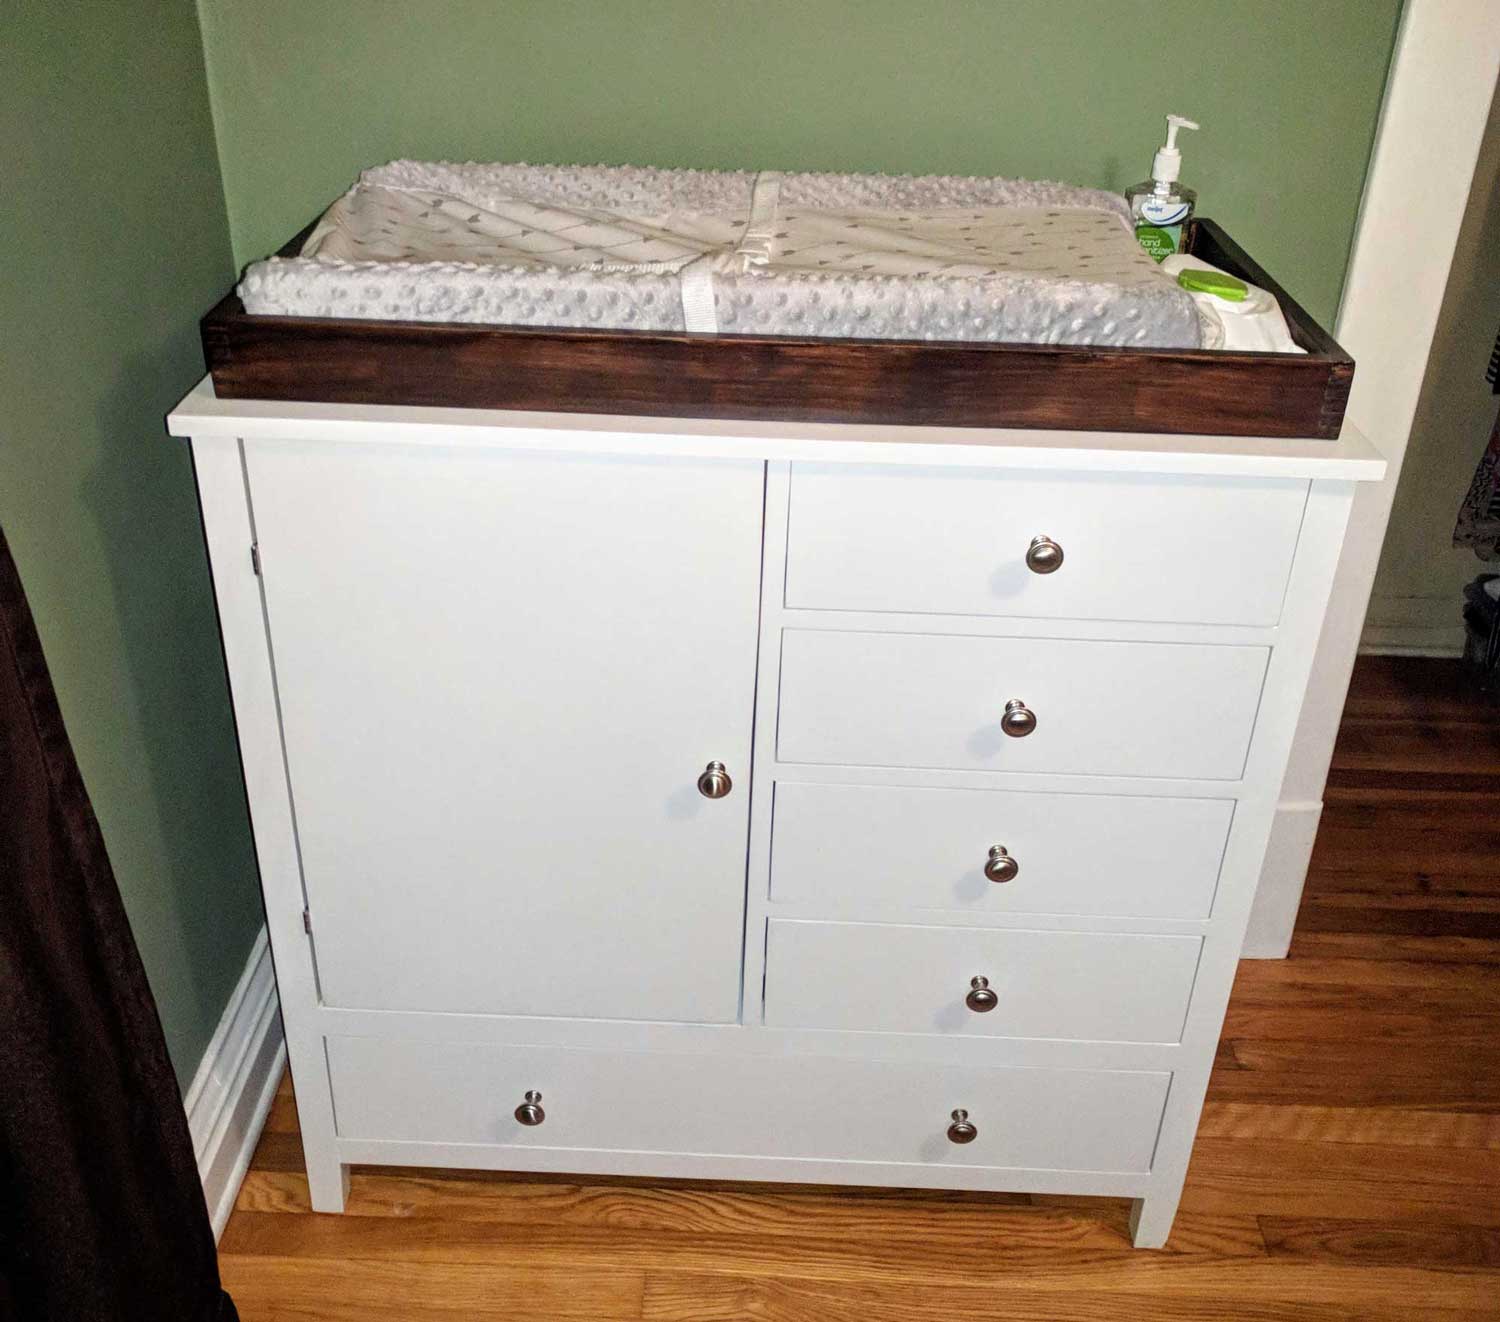
It took a lot longer than I wanted, and it is really far from perfect, but it is pretty satisfying to see it all done. I’ve made some shelving and stuff before but this is the first thing I have made that wasn’t destined for a basement or garage. My plan to finish a small woodworking project each week took a bit of a hit, but hey, nobody’s perfect. On top of that, my son came 5 weeks early, so it wasn’t quite on time. I’ve been learning a lot about woodworking online lately, and really enjoy when people post their thoughts on a project, so I thought I would do the same.
Making Plans
I had a lot of trouble finding plans that I liked for this. Originally, I had wanted to make a simpler version of a changing table that I had found online here. My wife wasn’t a fan of the open design because she thought it would look messy when it was full. I then looked around at plans online and decided to make a split dresser with drawers on one half and a section for hanging clothes on the other. I’m glad she said something because this is a lot more practical for us, especially since what we really needed was storage for clothes.
I found a few designs, but none that worked exactly, I decided to roughly follow this design, but substitute dowels to hold the panels together and box joints for the drawers. I also made the changing pad holder a separate piece and just attached it with mending plates in the back so that once we don’t need it anymore we can take it off and just use it as a dresser.
The Build
All in all, it went fairly well, but took a lot more time than I was anticipating, and cost a bit more as well. It’s all made of pine, the larger panels are all pine plywood. It hurt to have to buy the nicer “select” grade pine but I think it was the right call in the end. I ended up making the top from a piece of edge-banded 3/4″ plywood I had left over from the sides to save some money, as I was planning on putting a changing pad holder on top of it anyways. The doweling jig I bought was pretty easy to use and I will definitely make some more things using it. The pocket screws were quick and easy, I borrowed a jig for this project, and it’s definitely on my list of things to get now.
I tried making a cross-cut sled before I started to help get accurate cuts. I didn’t do a ton of research and it turns out I made all the mistakes I would read not to make later. It was huge, way too big to use easily, and I made the runners too short, so when I got all the way to the end of a cut it started losing its accuracy and wiggling. As a result, I spent a few nights and a Saturday making something that I promptly set in the corner in anger and haven’t moved since.
Failed attempt at a cross-cut sled
Tapering Jig for the legs
I also made a tapering jig to taper the legs and that worked pretty well. I needed a jointer jig as well, so I kind of cheated and went for a two in one. The clamps on the risers were for the 2×2’s that I tapered, the ones without can hold 1/2″-1″ boards to prep them for jointing. Got the clamps at Harbor Freight so it was pretty inexpensive. To use it to taper, I just eyeball how much I want to taper, clamp a stop block on the end and a scrap piece in the middle that pushes the far end out how far I need. It’s not high tech or probably the best way to do it, but it worked great for me.
Speaking of tapered legs, if you look close, the taper on the front right leg is going the wrong way, I wasn’t paying attention when I drilled the dowel holes and I didn’t have any more 2×2 stock so I left it. Oh well, adds character right?
Finishing took a lot of time. I painted the dresser itself with semi-gloss white paint we had left over from the trim in our house and top coated it with spray on polycrylic. I decided on polycrylic as a top coat because I assume this thing will be getting peed on a lot. I finished the drawers with spray lacquer. I went with lacquer because it dries so fast, I was able to knock out all of the drawers in an afternoon. The top I finished with a stain and polyurethane in one. I went with the two in one to save time, since the child it was for was already 8 weeks old at that point. It doesn’t look great, but since it is mostly covered anyways I just put the best side forward and called it good. I had wanted to turn my own drawer pulls, but with the timeline so far behind, I just bought some. My wife picked them out, she has a better eye for it than I do and I really liked them.
After Thoughts
If you are starting out, don’t go for inset drawers, they are a real pain to get right.
If you are only using one pocket screw to attach something, you need to really clamp it in place to keep it from swiveling, I had all kinds of issues with the small 1×2’s in between the drawers, I ended up putting a clamp on the side piece right above and below them and that worked out okay.
When you attach the drawer slides to the drawer, make sure you leave some room so you can adjust them. I butted them all the way to the front at first, then when I was working on flushing them tot he cabinet, if the drawer was too far out I had to take the whole thing off and move it back.
Finishing takes just as long if not longer than building.
If you asked me anytime in the last three to five weeks, I probably would have told you I will never do anything like it again. Now that it’s done, I can say I totally will, but I think I might stick to smaller things for a while.
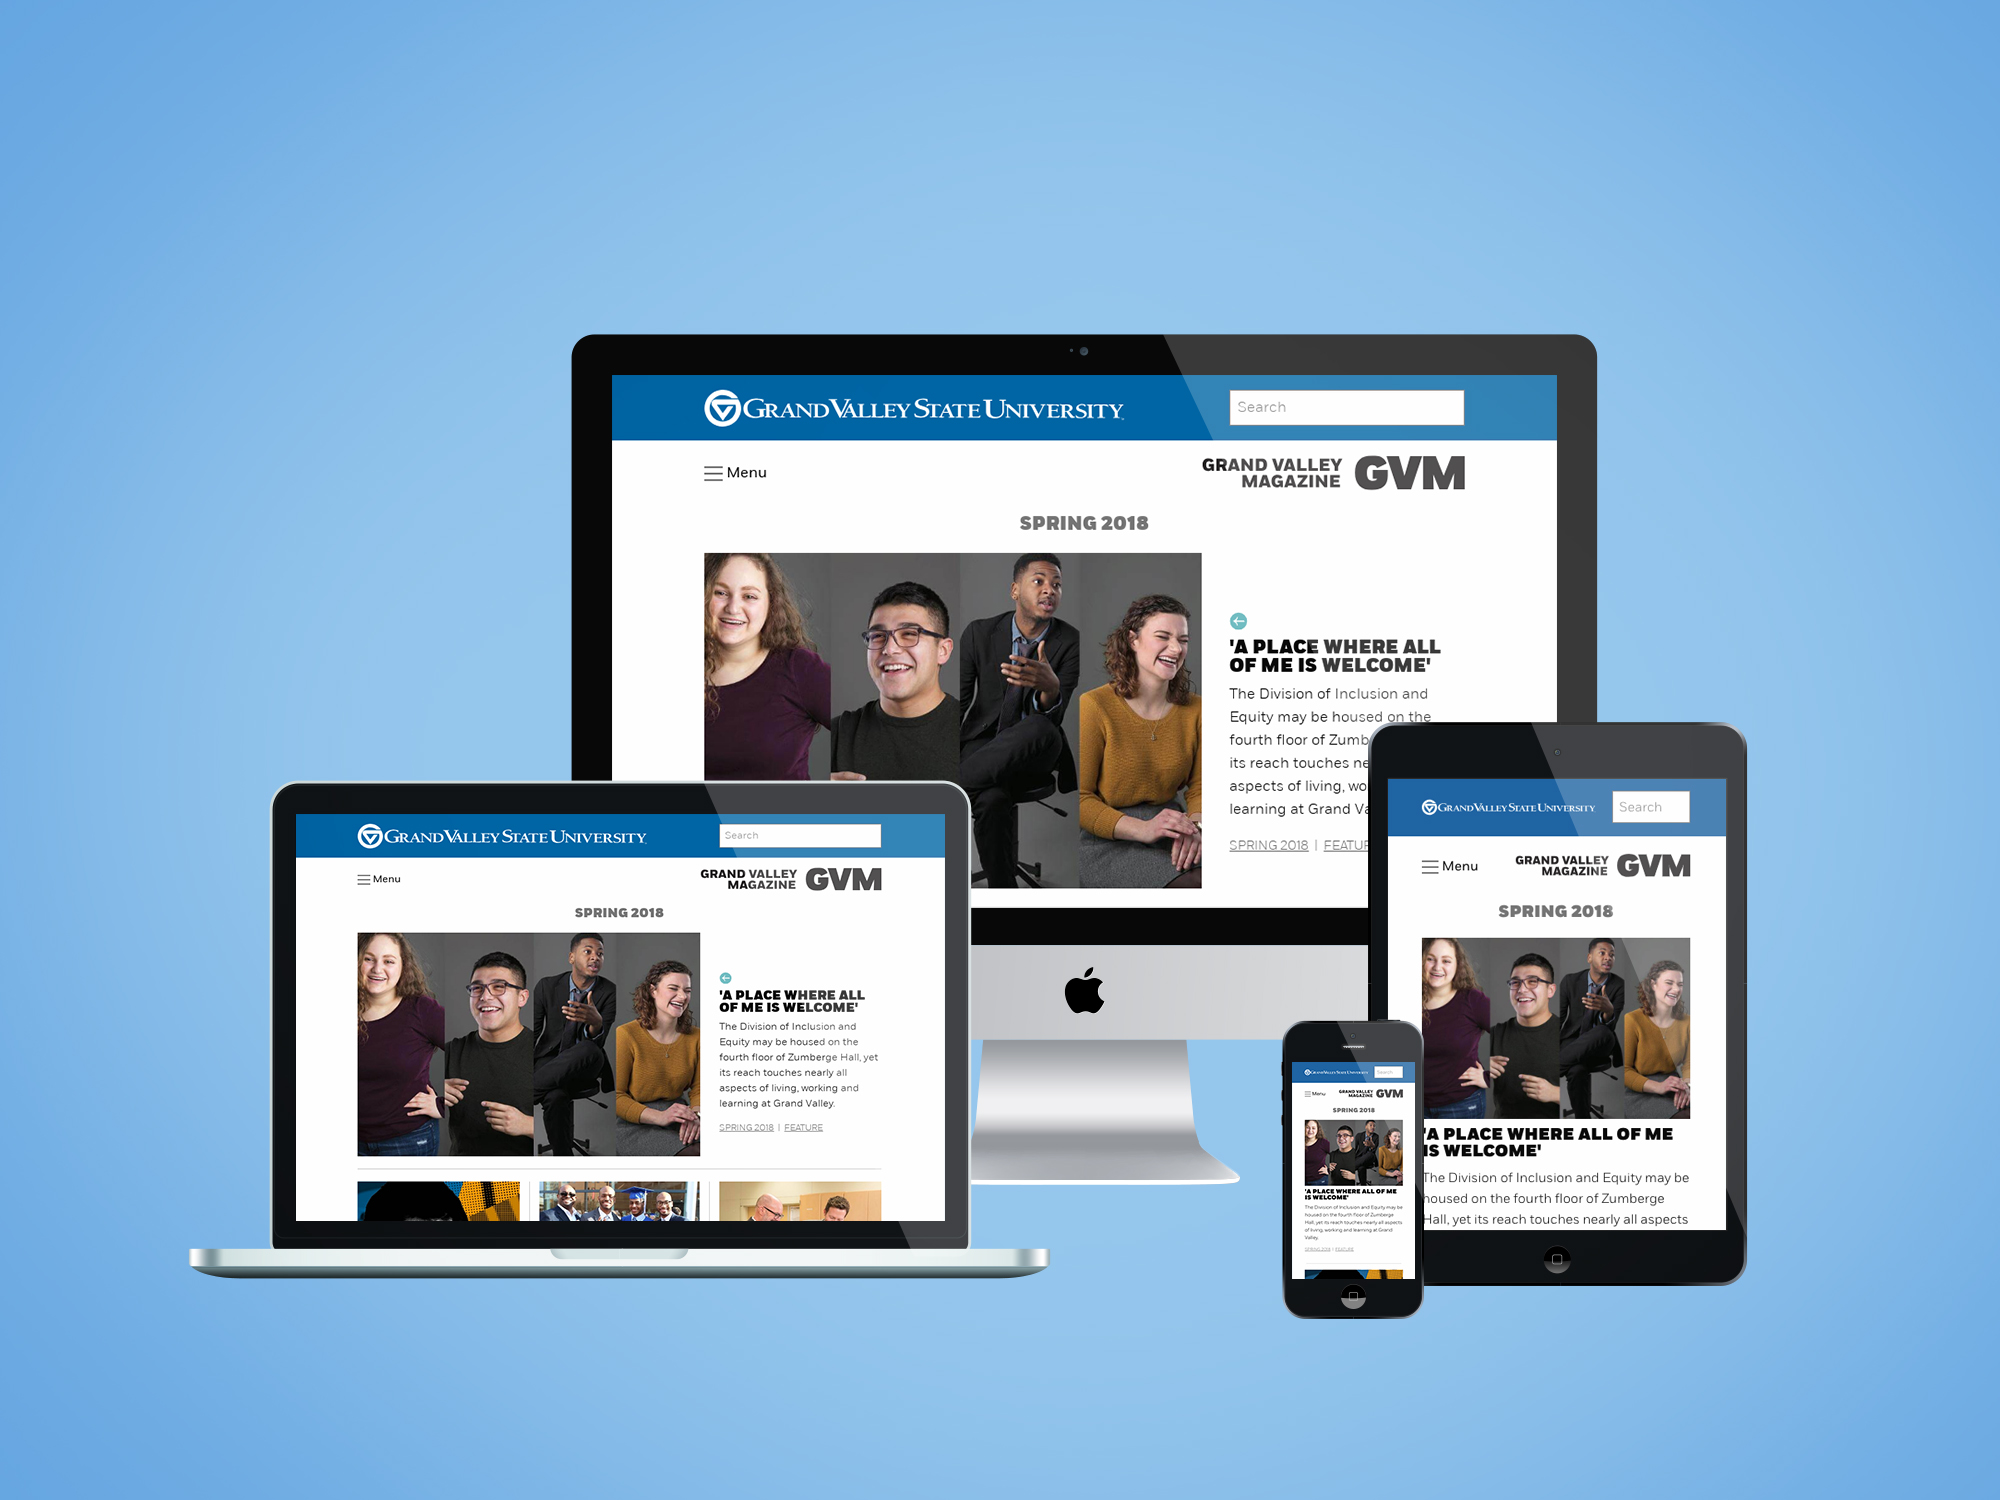
I recently finished up a fun project at work and thought I would share it, you can see it live now at https://www.gvsu.edu/gvmagazine. GVMagazine is the quarterly magazine that gets sent out from the university to keep alumni up to speed on what’s happening around campus,
It was fun for a few reasons:
Designers are awesome
I was working off of design specifications from some of our very talented graphic designers. Most of my projects tend to lean heavily on the CSS framework we built into our CMS, as opposed to totally custom design. Not that there is anything wrong with that, but it is fun to work with something new that is so well thought out. I used the foundation framework for some of the basics, but most of the design is custom. I am an adequate designer when I need to be, but they are on another level and I think that is shows in the end product. There also is now a really great continuity from the print piece to the online version that wasn’t there before.
React for the win
The public design was fun to implement, but the really fun part of this was creating the custom admin/CMS. I was developing this project solo so I got a little more leeway and decided to use react for the content editor. It was the biggest project I’d used it for so far, so I got to learn a bit and the end result was great. It was a little complicated because the design called for a lot of features in the articles: images, video embeds, pull quotes in multiple styles, and “featurettes” throughout the page. In the end, the users creating content have loved it and it really gave me a lot of flexibility. I was able to use the same styles for the admin and the public side so that it truly became a WYSIWYG editor, something I have been chasing for a while. It was a little tricky tying into the back-end system that we use, but it ended up not being as I thought it was going to be.
I used to post yearly resolutions here, but haven’t for a few years and wanted to get back into it. I’ll call these goals because resolutions start at the beginning of the year and it’s….later.
Finish one woodworking project a week
I got a wood lathe as a Christmas present this year, and I would like to get decent at it. I’ve also wanted to do more work with the other tools I have. Practice makes perfect and all, so the goal is to finish at least one woodworking project a week, even if it sucks.
Eat out less
Specifically, lunch. I used to NEVER eat lunch out, then at some point I got in the habit of it and if I’m honest it’s only ever gotten worse since. So this year I’m going to try to do a better job prepping lunch the day before work so I can try to break that habit.
Brew 6 times
I started brewing beer two years ago, and the results were decent, but I haven’t given it the time that I wanted. So this year I would like to make at least 6 batches. I drink most of the beer I make, and 6 full batches would be around 30 gallons. So, I’d also like to start looking into smaller one-gallon batches. That would be cool because then I could try all grain brewing without needing any more equipment.
5 Web Projects
I already have a few side projects lined up and have a few of my own ideas that have been percolating. I’m hoping to get at least five of them live this year, including at least a face-lift for this site.
Write/Post three things a month
This kind of goes along with the last goal. I’ve had some sites that have languished on without updates for far too long. This is the year they either make the cut and I start posting again, or they go away. Here you will see more about my web projects and foray into woodworking. You might even witness the long-awaited return of the teageek…
Solidify a morning routine
I’m a natural night-owl. It’s actually 11:53 p.m. as I write this. Last year though, I started getting up about an hour before I normally do. It was really great to have some time in the morning to cook a real breakfast and not rush around. I want to expand on that and make a little more structured daily routine. Hopefully, that will solidify the habit and set up some time in the morning. I’ve read a little about journaling and meditation recently and would like to try it out.
Well, there you have it, my goals for (the rest of) 2018.
A while ago while doing an accessibility review of a site I was working on, I realized that the button styles I was using, which I imported from Bootstrap 3, were failing my accessibility checker. The default colors of the primary, default, and warning buttons all fall short of the 4.5:1 contrast ratio required for WCAG 2.0 specs.
At first, I assumed I just didn’t have the latest version of bootstrap, but after searching around I found a post on bootstrap’s Github page, which essentially said they aren’t interested in changing their design to accommodate at this time. Disheartening to see from a big company/framework, but not to be deterred, I headed over to Google. I assumed I could find some neat little CSS classes someone had created, and continue my day. I found a post from Scott Galloway on Codepen that I thought was perfect, but when I ran it by my coworker for review, he pointed out that if someone was color-blind (as he was), it was really difficult to determine which button was which:
Out of easier options, I took a shot at it myself. Working with some of my coworkers, I came up with some requirements we had for the buttons:
Pass WCAG 2.0 Guidelines
Work well for common color-blind variants
Maintained the look and feel of the Bootstrap
A common recommendation was making a custom color palette and changing them completely. Our issue with that solution was that the buttons were part of a custom CMS, and if you’ve never worked on a CMS, users tend to get unhappy when you drastically change their designs without warning. Because of this, the last point of maintaining the look and feel was important. In a perfect world, we could change the buttons without anyone noticing.
(The trick was to invert the hover/active color to have a white background and colored text, otherwise making the info and warning buttons dark enough to pass accessibility made them either hard to differentiate, or just plain ugly.)
It worked! We swapped the styles out in our custom CMS and have never received a complaint from our users about the change, and can feel good that the buttons now pass accessibility. I figured there may be some other developer out there right now looking for the same thing and threw it on Github. Hopefully, it can save someone a little bit of time and make their site more accessible.
(On a side note, yes, my site has some accessibility issues, it’s on the to-do list, my only excuse is I made the theme about 5 years ago, and am just getting back into writing here.)